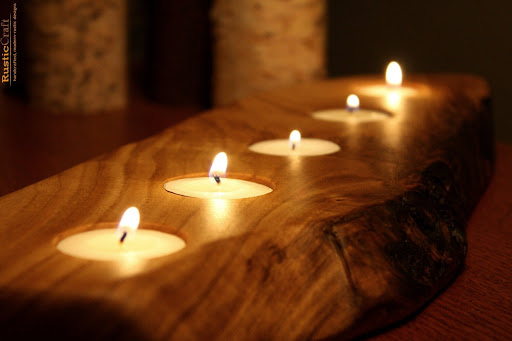
Candles have long been a staple in our homes, providing warmth, ambiance, and a sense of relaxation. If you’re looking to take your candle game to the next level, why not try making your own 4 wick candle? In this article, we’ll guide you through the process of crafting the perfect 4 wick candle, from understanding the basics to troubleshooting common problems, and even exploring different styles and scents. So, let’s dive in and unleash your creativity!
Understanding the Basics of 4 Wick Candles
Before we get into the nitty-gritty of making a 4 wick candles, it’s essential to understand why four wicks are important. Four wicks allow for an even burn and efficient melting of the wax, ensuring that your candle lasts longer. Additionally, multiple wicks create a beautiful, flickering glow that adds to the overall aesthetic of the candle.
The Importance of Using Four Wicks
Using four wicks instead of a single wick not only enhances the aesthetics but also improves the candle’s performance. With four wicks, the heat is distributed more evenly across the surface of the candle, reducing the risk of tunneling and ensuring that the wax is fully utilized during burning.

Materials Needed for a 4 Wick Candle
Now that you understand the benefits of using four wicks, let’s gather all the materials you’ll need to create your own masterpiece:
- Wax – Choose a suitable wax for your candle, such as soy wax or beeswax. Ensure it is of high-quality, as this will directly impact the burn time and quality of your candle.
- Wicks – Select four wicks that are appropriate for the size of your candle. Cotton wicks are commonly used as they offer a clean burn and easy maintenance.
- Container – Find a container that is heat-resistant and visually appealing. Glass jars or ceramic vessels work well for 4 wick candles.
- Dye – If you want to add some color to your candle, choose a suitable dye. Liquid dyes or dye chips are commonly used in candle making.
- Essential Oils or Fragrance Oils – To add a delightful scent to your 4 wick candle, choose essential oils or fragrance oils that complement your desired fragrance profile.
- Double Boiler or Wax Melter – This equipment will be used to melt your wax safely.
- Thermometer – Essential for monitoring the temperature of your wax to ensure optimal pouring conditions.
- Containers for Mixing and Stirring – Have separate containers for melting and mixing your wax, as well as a heat-resistant stirrer.
Now that you have gathered all the necessary materials, let’s delve into the fascinating world of 4 wick candle making. Imagine the possibilities as you combine different scents, colors, and containers to create a unique and captivating ambiance in your space.
When selecting the perfect wax for your 4 wick candle, consider the burn time, scent throw, and overall quality. Soy wax, derived from soybean oil, is a popular choice due to its clean burn and eco-friendly nature. Beeswax, on the other hand, offers a natural honey-like aroma and a longer burn time. Whichever wax you choose, ensure it is free from additives and chemicals that may affect the performance of your candle.
As you explore the world of candle making, you’ll discover a wide range of wick options. When selecting wicks for your 4 wick candle, consider the diameter and depth of your container. A wick that is too thin may result in an uneven burn, while a wick that is too thick may cause excessive heat and smoke. Cotton wicks are a popular choice for their reliability and clean burn, but you can also experiment with other materials like hemp or wood wicks for a unique touch.
Step-by-Step Guide to Making Your 4 Wick Candle
Preparing Your Workspace
Before diving into the candle making process, it’s crucial to set up a clean and organized workspace. Clear any clutter and ensure you have all the necessary tools within reach. Cover your work area with newspaper or a disposable tablecloth to protect it from spills and wax drips.
Creating a serene and inviting workspace can enhance your candle making experience. Consider adding some calming music or lighting a scented candle to set the mood. This will not only make the process more enjoyable but also create a relaxing atmosphere as you craft your own 4 wick candle.
Choosing the Right Wax and Wicks
Now that your workspace is ready, it’s time to melt your wax. Following the instructions provided with your chosen wax, heat it in a double boiler or a wax melter until it reaches the recommended temperature. Use a thermometer to ensure you don’t overheat the wax.
Choosing the right wax for your 4 wick candle is essential for achieving the desired burn time and scent throw. Consider experimenting with different types of wax, such as soy wax or beeswax, to find the one that best suits your preferences. Each type of wax has its own unique characteristics that can enhance the overall quality of your candle.
In the meantime, prepare your container by affixing four wicks to the bottom. Ensure they are centered and secured, so they remain straight during the pouring process.
When selecting wicks for your 4 wick candle, it’s important to consider the size and diameter of your container. Choosing the right wick size will ensure that your candle burns evenly and efficiently. If the wick is too small, the flame may struggle to melt the wax completely, resulting in a tunneling effect. On the other hand, if the wick is too large, the flame may produce excess soot and smoke. Find more about tunneling effect on https://warwick.ac.uk/fac/soc/economics/news/2013/4/tunneleffect/
Once the wax has reached the correct temperature, it’s time to add any desired color or fragrance. Follow the recommended guidelines for the quantity of dye or oil to achieve the desired intensity.
Experimenting with different colors and fragrances can add a personal touch to your 4 wick candle. Consider using natural dyes or essential oils to create unique and captivating scents. Whether you prefer a calming lavender aroma or a refreshing citrus burst, the possibilities are endless.
Assembling Your 4 Wick Candle
With the wax colored and fragranced, it’s time to pour it into your prepared container. Gently and steadily pour the wax, being careful not to disturb the wicks. Leave a small gap at the top of the container to allow for the wax’s expansion as it cools.
Watching the wax gracefully flow into the container can be a mesmerizing sight. Take a moment to appreciate the beauty of the process as you pour, knowing that each step brings you closer to creating a stunning 4 wick candle.
Allow the candle to cool and solidify completely before trimming the wicks to a suitable length. This will ensure an even burn and minimize smoke. It’s recommended to trim the wick to around 1/4 inch before lighting the candle.
Trimming the wicks not only promotes a cleaner burn but also prevents the flame from flickering and producing excessive soot. By taking the time to trim the wicks, you are ensuring that your 4 wick candle will provide hours of warm and inviting illumination.

Troubleshooting Common Candle Making Problems
Fixing Uneven Burning
If you notice that your 4 wick candle is burning unevenly, there are a few things you can try:
- Rotate the candle periodically to distribute the heat evenly.
- Ensure the wicks are trimmed to the proper length before each use.
- Choose a wider container for your next candle to provide better airflow.
Another helpful tip to address uneven burning in your candles is to consider the type of wax you are using. Soy wax, for example, tends to burn more evenly compared to paraffin wax. Additionally, experimenting with different wick sizes and materials can also make a significant difference in achieving a more uniform burn throughout the candle’s lifespan. Click here to learn more about lifespan.
Dealing with Wick Submersion
If your wicks are having trouble staying lit or are consistently submerged in the melted wax, try these solutions:
- Use wick holders or clips to keep the wicks in an upright position.
- Reduce the amount of fragrance oil used, as excessive oil can weigh down the wicks.
- Ensure the wicks are centered when pouring the wax to prevent them from shifting.
In addition to the aforementioned solutions, another effective way to prevent wick submersion is to let your candle cure for at least 24 hours before lighting it. This allows the wax to fully harden around the wick, providing better stability and reducing the chances of it getting drowned in the pool of melted wax. Furthermore, choosing a higher quality wick that is specifically designed to stand tall and straight during the burning process can also help alleviate wick submersion issues.
Maintaining Your 4 Wick Candle
Proper Candle Burning Practices
To ensure the longevity and safety of your 4 wick candle, follow these best practices:
- Trim the wicks to around 1/4 inch before each lighting.
- Avoid burning the candle for more than four hours at a time to prevent overheating.
- Never leave a burning candle unattended and keep it away from flammable objects.
Additionally, it’s important to place your 4 wick candle on a stable, heat-resistant surface to prevent accidental spills or tipping over. Using a candle snuffer to extinguish the flame can help prevent hot wax from splattering and keep the wicks in good condition for future use.
Cleaning and Storing Your Candle
Over time, candles may accumulate dust or become discolored. To keep your 4 wick candle looking its best, gently wipe the surface with a damp cloth or use a soft brush to remove any debris. Store your candle in a cool, dry place away from direct sunlight, as exposure to heat and light can cause discoloration or melting.
Furthermore, if you notice any tunneling (uneven wax melt) while burning your candle, consider using a candle warmer to gently melt the wax around the edges and create an even burn pool. This will help maximize the fragrance throw and ensure a longer burn time for your 4 wick candle.
Exploring Different Styles and Scents
To find about wood wick candle click here.
Adding Color to Your 4 Wick Candle
While a plain white candle is timeless, adding color can elevate the visual appeal. Experiment with different dyes and techniques to achieve unique and eye-catching color combinations. Whether you prefer vibrant hues or subtle pastels, the possibilities are endless.
Incorporating Essential Oils for Scent
Aside from their aesthetic appeal, candles offer an opportunity to indulge in delightful scents. Essential oils provide natural and aromatherapeutic options, while fragrance oils offer a wide range of enticing scents. Mix and match different oils to create your signature fragrance or recreate your favorite scents.
Now that you have all the knowledge and inspiration, it’s time to unleash your creativity and start crafting your perfect 4 wick candle. Enjoy the magical glow and enticing scents that only a handcrafted candle can provide. Happy candle making!